Posts

Showing posts from May, 2014

A New Look for Our Dining Room Chairs

Image
We bought our dining room set almost 7 years ago when we moved into together. Some days it seems like yesterday we were driving through our favorite neighborhoods in East Fort Lauderdale looking for our "perfect" first place together. The reality was that it's was the Mister's first purchase and I wasn't going to move in right away. I was going to wait until my lease was up. Ha! Here's how it actually played out... he closed on the town home(late October), I helped with all of the decorating, slept there on a daily basis, we got engaged a little over a month and half later (Dec) and I officially moved all of my stuff from my apartment to our house by March. Needless to say, I did help pick out the dining room set. After 7 years, a move and now 2 boys, the set is still in good shape. It actually now sits in our formal dining area and is typically used at holidays or when we have company. Hence, why it is still in great condition. Recently, I had this great id...

Traveling With Young Children {Packing List}

Image
I use to be one of those people who would carelessly pack the night before a trip. I would visually pack a few days before and then just throw it all in a bag. Well, boy have times changed. Now I pack for at least 3 of us and there is an entire process behind it, which starts with a list and at least 4 days prior to leaving. It seems as if I pack half my house in order to entertain the boys or be prepared for "what if" scenarios. For Memorial Day weekend, the 4 of us headed to St. Augustine with a few other families. We had a great time despite P running a low grade fever for 2 of the 4 days we were there. We stayed at the Summer House , a great place for families. The unit we stayed in was a 2 bedroom 2 1/2 bath townhouse with a full kitchen and even a small washer and dryer (yes, I did laundry while on vacation). It was perfect for us, especially having a young one. It's nice to have a fridge for milk and other snacks on hand. The families we were traveling with are p...

Mother's Day Gift {Photo Garden Pot}

Image
We're going to go ahead and call this one a Flashback Friday project. Why recreate the wheel, right? Who has time for that anyway... So I made this two years ago for my Mother-In-Law and this year decided to make one for my mom. My favorite part about this project is looking back through all the pictures. With the digital age, we don't get to do that often. I am almost finished with this year's Photo Garden Pot for my mom, but thought I'd share the one I made a few years ago with all of you since we're running out of time to get crafty. Have fun! http://dontunderestimatemommy.blogspot.com/2012/05/mothers-day-photo-pot.html                   

Mother's Day Gift Idea {Mason Jar Picture Vase}

Image
Still looking for Mother's Day gift ides? I've got a couple more to share. This one is super simple and luckily I had all of these materials on hand. Who doesn't love Mason Jars? When I saw this sweet, little project it made me all warm and fuzzy inside. Inspired by- Home Stories A-Z What you'll need: -Mason Jar (I used a pint size, but you could definitely use a large one, it's personal preference) -Paint color of your choice -Paint brush (I like the foam brushes for this type of project) -Decorative paper scissors -Painters tape -Vinyl shape or sticker -Clear paint -Picture 1. First step is to cut your picture place saver. I happen to have contact paper on hand which worked perfect. I used scalloped scissors to cut out a square for my picture frame place saver. If you have a circuit machine and vinyl, this would work as well. If you don't have any of these materials, you could try using paper and securing it with two sided tape. Just make sur...

Mother's Day Gifts {Bragbooks}

Image
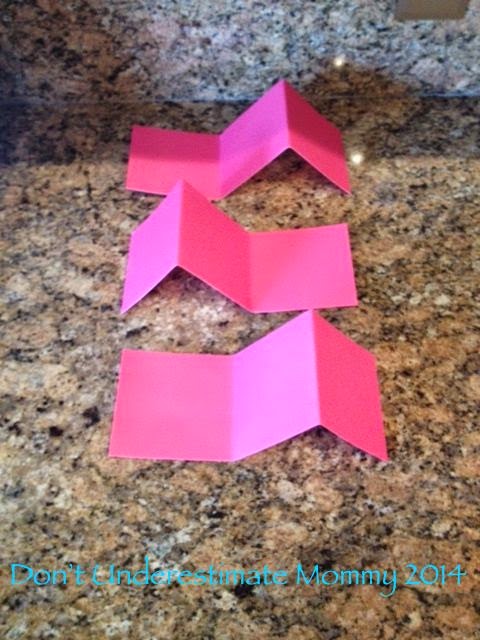
Since Mother's Day is just a few days away, I thought it best to share what I've been working on for our Grandma and Nina. I've seen these brag books time and time again, but never had an interest in them. While searching for  gift ideas, I stumbled upon them again and decided to give it a shot. The best part about this project, was I already had all of the necessary materials. Bonus! Inspired by: Eighteen25 What you'll need: card stock  (12"x12", 1 sheet will make an album with 7 pictures) patterned scrapbook paper paper cutter sticker lettering (optional, you could hand write or download sayings) ribbon glue embellishments 1. Cut (3) 4"x12" paper strips. 2. Score and fold every 4". 3. Glue the last fold on the first paper to the first fold on the second paper and repeat with the third paper. 4. Cut (7) 3 3/4" squares for your pages. Adhere to each page. I used regular Elmer's glue. I chose white pap...